Showing posts with label Android Tutorial. Show all posts

Sunday, February 12, 2012

update CWM 5.2.0.8

 
Update Clock Work Mod 5.2.0.8


Best android apps


How to Install update file

1. Put this file into your SDCARD
2. Go to CWM recovery
3. Choose this file
4. Flash it
5. Go to advanced menu
6. Reboot recovery
7. Done

*Thx for Yanuar For Software


PassKey:
bestandroidsgames.blogspot.com
Readmore >>; update CWM 5.2.0.8

Saturday, February 11, 2012

Android Firmware 2.3.6 Upgrade (Galaxy Mini)

Now we try to upgrade Android device with Chocobread (Ginggerbread 2.3.6)
i use Custom ROM for this upgrade, why not use official ROM the reason is the official have some bug and can't tweak with custom ROM you can tweak or even Over Clock your device with easy thing

ok i will explain how to do upgrade your Android Device:

I use Clock Work Mod for to do this Upgrade if your device hasn't setup for CWM you can read my post Before the post explain how to

Flash Clockworkod Recovery


Flash Custom Rom:
  1. Download and  copy custom ROM, Place on your SD Card.
  2. Reboot to insert the Recovery Mode (Press and Hold "Power Button+Center Button").
  3. Choose Installation Zip file from SD Card.
  4. Chose from SD Card
  5. Choice custom ROM  your Download before
  6. Choice Yes - Install update
  7. Wait until installation progress complete.
  8. Choice Reboot System.
  9. Recommended to WIPE DATA & CHANCE after installation complete to minimize error during installation

Chocobread 2.3.6

Change log

- Base 2.3.6 WMKPJ
- Include Overclock 864 MHz (Depend your device, please rise your CPU speed step by step until you found stability device).
- New feature kernel ,I/O scheduler & Governor, support filesystem EXT2/3/4,RFS, FAT16/32/NTFS.
- 9 Lockscreen, CM screenshot, 14 toogle statusbar (porting from emanon ROM).
- ICS (icon launcher, fonts, transition animation).
- Date & Center clock.
- Dark-tremor (fast reboot after move Dalvik).
- Block ads.
- Sq-lite patch.
- New Boot sound chocobread.
- Bravia Engine.
- DSP Manager.
- Update some application (Superuser+su binary, you tube, real calc,terminal,etc).
- Use Google DNS.
- MIUI Music, File manager, No-frills CPU, Touchwiz Launcher.
- Old Market.
- New init.d script.
- UI Improvement.
- New wallpapers.

PassKey:
bestandroidsgames.blogspot.com
Readmore >>; Android Firmware 2.3.6 Upgrade (Galaxy Mini)

Flash Clockworkod Recovery:


best android apps


Now i wanna explain to you how to upgrade your device with ClockWorkMod (CWM)
why must use CWM to upgrade the android device?
one reason why upgrade with CWM because with CWM you can upgrade your device without PC, so its very easy and simple right
so let's we start

1. You must have CWM Recovery tools first
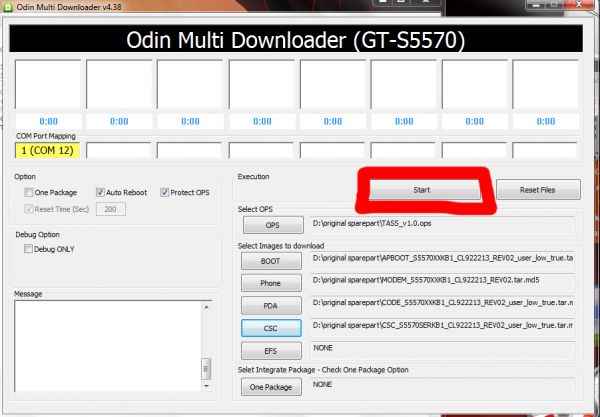
2. Open Odin Multi Downloader (We need this just for inject tool to system)
3. Choice TASS.ops
4. Checklist One Page Option (you can see thee option on right under corner)
5. Insert Tass-recovery-cwm.tar on One Pakage
6. Press start button to start the process

to check CWM is work or not, after your device working well press "Power Button + Center Button" (Hold Them Together until your phone reboot) wait until recovery manager come

on recovery manager you can wipe data and upgrade device


* Thank To Master Yanuar for this Tools

PassKey:
bestandroidsgames.blogspot.com
Readmore >>; Flash Clockworkod Recovery:

Friday, January 13, 2012

Galaxy 5 upgrade firmware

CyanogenMod 7.2.0-RC0 "Galaxy 5" Port
Latest release: v1.8 hotfix 1 [7 January 2012]


Hey folks,

This is a port of Cyanogen 7.2.0-RC0 based on Android Gingerbread 2.3.7) for the Samsung Galaxy 5 I5500 (Europa) phone. The current port status is stable - most hardware is working correctly, but see post #2 for known issues.

Special thanks to Motafoca for starting Cyanogen development, OuNao & mikereidis (author of Spirit FM Radio app) for helping with FM audio issues (buy Mike's app to show appreciation), and of course, thanks to all of you for testing!

Pre-requisites:
  • Install ClockworkMod Recovery.
  • Visit the Basebands thread and install a baseband that is marked as compatible with CyanogenMod. Since v1.5 hotfix2, any Froyo baseband should work fine.
  • Optional: ensure that you have a backup of your current ROM and user data.
Installation:
Note 1: If you are upgrading from an older CyanogenMod version, you always need to re-install the Google Apps package, even if you had previously installed it.
  • Reboot into ClockworkMod. You can do this via adb reboot recovery, or by choosing the Reboot -> Recovery menu if you are already using CyanogenMod.
  • If you are upgrading from Eclair or Froyo, you absolutely must perform a data wipe: Select wipe data/factory reset and confirm the operation. Note that you will lose all of your user data, so be sure that you have performed a backup. Otherwise, skip to the next step.
  • Choose the option install update from sdcard -> choose zip from sdcard. You will see the two (or three) .zip files in the list.
  • You must install the two (or three, if you have a hotfix) files in this exact order:
    • The base package named update-cm-7.X-MADTEAM-vX.Y-signed.zip
    • [If exists] The latest hotfix package for the same base package version, named galaxy5-vX.Y-hotfixZ.zip
    • The Google Apps package, named gapps-gb-DATE-signed.zip
  • Once all packages are installed, you can now reboot.
Installation (hotfix update):
Note 1: only install a hotfix for the same base version of the ROM that you have installed (e.g. use v1.5 hotfix1 only on the v1.5 release).
Note 2: you only need to install the latest hotfix version, as it will include all the updates from previous versions.
Note 3: Hotfixes do not require a data-wipe.

  • Download the latest hotfix package and transfer to the SD card.
  • Reboot into ClockworkMod Recovery.
  • Choose install update from sdcard -> choose zip from sdcard, select the hotfix and confirm installation.
  • Reboot.
thx to madteam.
Readmore >>; Galaxy 5 upgrade firmware

Friday, January 6, 2012

How To Rooting Samsung Galaxy Wonder


How To

Rooting SG Wonder


DISCLAIMER
You should understand not only the benefits of rooting, but also any possible consequences (voided warranty, boot-loops, bricking, etc.) that might occur as a result of your root-related actions.
 

Ready ?
1. Download your Driver Handset. (Automatic if use Windows 7 OS) Download Driver
2. Download file you need here sini
3. Before begin the process please make sure:
  • check"USB DEBUGGING"
      from (Menu\Settings\Applications\Development)
  •   check"UNKNOWN SOURCES"
      from(Menu\Settings\Applications)
  • (Optional) make screen timeout being 10 minute.
  • Connect your Hand Phone to computer with data cable.
3. Extract file your download before,go to navigation file we just extract( ex: C:/Documents\Downloads\Compressed\DooMLoRD_v3_ROOT-zergRush-busybox-su)
4. Double click file "RUNME.bat"
5. Read and follow the instruction and wait until process done.

 
Readmore >>; How To Rooting Samsung Galaxy Wonder

Thursday, January 5, 2012

SE X10 (TripNMiUI "Iris" 1.5.2 & 1.2.4 Gingerbread! - MIUI 1.8.5 & MIUI 1.7.22)

best android apps

ROM: TripNMiUI Gingerbread
- Latest release 07-08-2011
- Rom versions
Road 1: 1.2.4
Road 2: 1.5.2
- Gingerbread 2.3.5 / 2.3.4
- MIUI 1.8.5 / 1.7.22
- Fully working camera
- MIUI Themes
- Wifi (version 1.5 and higher need to use static-ip)
- GPS
- Prepared for TripNFeatures
TripNFeature 01 tweaks&hacks included
- Needs baseband .54 or higher
other basebands untested
- New edited TripNMiUI theme
- Quadrant results 1500+ (version 1.5.*)
- Radio hacks included
- Improved screen quality (Bravia!)

Working:
- Mobile phone (network and data)
- Wifi
- GPS
- Hardware sensors
3-axis Accelerometer
3-axis Magnetic field sensor
Orientation sensor
Proximity sensor
Gravity sensor
Linear Acceleration sensor
Rotation vector sensor

Changelog 0.3.0:
- Almost all lag is gone (when it settles there should be no lag)
- Screen quality better then before
- Games should play faster
- More fixed
changelog will be edited tomorow

Changelog 0.3.5:
- Some lagfixes
- Multilanguage
- Rebuilded for more stable feelings
- Radio issues fixed (should run on baseband 58 and higher)

Changelog 0.4:
- Update to MIUI 1.6.3
- Improved lag-fixes
- No lag on launcher with shadows on
- No lag in settings menu
- Disable auto rotation to fix all lag
- Tweaks edited
- TripNMiUI theme edited
- Phone and SMS app edited (dont select advanced->text during call = FC)
- Rotation lag identified (cant be fixed now it will break camera)
- HSDPA, HSPA, HSUPA, HSXPA connections improved
- Charging optimized

Changelog 0.7 - 0.8:
- Updated to MIUI 1.7.8
- New theme system integrated
- Updated default theme
- Added MIUI Camera
- Fixed some text color issues
- Fixed WIFI issues
- Default MIUI torch app included (works!)
- Fixed screen going to max-brightness
- Stabilised camera functions
- Improved movie playback
- Lag fixes

Changelog 0.9:
- All FC fixed
- Rotation lag removed
- Text color issues fixed (integrated upon default MIUI style)
this ensures that almost all text issues are solved, i couldnt find any, let me know if you find them
- HW video decoder (95 - 99% working)
- Lag fixes (feels like a Froyo rom)
- Bluetooth system rebuilded
- Graphics system rebuilded
- Audio improvements (special effects, movie sound etc)
- 720P recording codecs integrated (not activated untill release is stable)
- Optimized images
- DVM reverted back to normal (no linpack of 46 in this one) DVM is placed back when release is stable
- Updated rendering solution
- Reboot the phone by hand after booting is complete (fixes all issues related to clean install)
- Fixed theme reverted to stock after reboot
- Many extras will be activated when this release is STABLE

Changelog 1.0
- mobile data fixes
- radio fixes
- radio edits to make signal more stable
- when signal is lost phone searches for the best alternative
- videoplayback improved
- sound improvements (more surround sound)
- display improvements
- lots of various improvements / fixes
- faster connection to router / ap
- improvements on smootness / lag
- imrovement of overall game experience
- performance boosts added (TripNFeature)
- edits in battery performance
- TripNEngine ported (30% done)

Changelog 1.2:
- Camera implemented
- Videocamera working up to 1280x720 incl. AAC audio
- Bravia Engine fully ported 1:1 from the Arc rom
- A lot of new tweaks included
- Baseband .54 and higher supported
- Baseband .71 advised
- Videoplayback improved
- Torch app removed
- TripNEngine removed to get camera working (coming back)
- Native usb tethering added

Changelog 1.3:
- HUGE IMPROVED ON GAMES
example quadrant first game test from 16fps to 28fps constantly (without fps uncap)
- Mobile data connection improved
- Upgrade to Android 2.3.5
- Upgrade to MIUI 1.7.29
- DSP Manager added
- Improved battery performance
- Improved overall rom performance
- CM7 keyboard added
- No wifi
- Updated to latest SU
- Quadrant result 1500

Changelog 1.2.4:
- FC in Settings/DND mode solved
- A lot of apps updated / edited
- Improved performance
- Mobile connections edited
- Google talk included & functional
- DSP Manager added
- Updated black theme
- New default lockscreen
- Updated to latest SU
- Updated keyboard
- Updated / edited Bravia engine to match xperia x10

Changelog 1.5:
- Update to MIUI 1.8.5
- Bravia engine updated to latest version (Arc 4.*)
- xLoud (always on!)
- FPS uncap
- Updated tweaks
- Apps2SD fixed
- Updated default theme
- Google Talk included
- Improved screen quality (related to Bravia)
- Torch lockscreen fixed
- Torch app included

Changelog 1.5.1:
- Updated tweaks
- Rom uses swapfile for all partitions (system, data, cache)
- Addblocker
- Updated system hack method

Changelog 1.5.2:
performance update only
- Quadrant score increase with +200 / +300
- Performance for games increased
- FPS stabilizer
- Scrolling/movement inside improved
- DVM tuned/optimised for 48M heap size
- Basic parts of TripNEngine ported (~10%)
- Audio recording editted
- Optimised swapfile usage

KNOWN BUG: PLAYING HIGH-DEF VIDEOS GIVES LOW QUALITY (only in version 1.3)
reason: bravia engine bricked, allready fixed so dont worry!
If you are not on my pre-rooted S.E. rom then follow these installation instructions exactly.
- download TripNMiUI-IRIS_Gingerbread_TripNRaVeR-v1.2.zip
- go to xrecovery 0.3 and install it
- DO NOT REBOOT
- pull out battery and wait for few seconds, to be sure wait 30 sec at least
- putt battery back in
- flash ftf file with Flash Tool
http://www.fileserve.com/file/FhPMRqY (download FTF file bb71+kernel)
- turn phone on
- enjoy TripNMiUI B)


Download 1.2.4:
http://www.fileserve.com/file/G9ThxZ3
Download 1.5.2:
http://www.fileserve.com/file/xmCG76w

TripNMiUI-Iris addon pack 001
http://www.fileserve.com/file/GyDVG6g
Addonpack contains the following (not included in rom itself):
flash trough xrecovery
- MIUI Compass app
- DSP Manager
- Google Maps
- Spare Sparts
- Street app
- Talk
- Voice Dailer
- Youtube

Hey z(ero) dont hate me cause you aint me :) You cant even fix a lousy Torch without stealing! Assbag

Have fun! Finally Gingerbread with a fully working camera! 
Readmore >>; SE X10 (TripNMiUI "Iris" 1.5.2 & 1.2.4 Gingerbread! - MIUI 1.8.5 & MIUI 1.7.22)

Monday, January 2, 2012

how to unlock Xperia X10

best android apps

!!! Do With Your Own Risk !!!
Very Not Recommended For Warranty
unlock boot loader=void warranty

Prepare:
-Download unlock
-flash tool GB Ready Here
-semc stock kernel+xrec Download 
-java
-driver x10
Steps:
-extract unlock_bl.zip to hdd on PC or Notebook
-Make sure your USB status  usb debugging and unknown sources must be choice
-Run flash tool GB ready and do Downgrade kernel
-After complete turn on the device and look a condition your device will be stuck on Sony Ericcson white screen (first vibration connect USB cable to Hand phone)
-Look on flash tool if busybox has been detected by binary........
-and then run the qsd8250_semc.cmd (just double click on the file)
and you will seen text like this:

process requires standard 2.x android firmware.
Press any key to continue . . .


-Close the flash tool
-Next pres any key (recommend to press enter key) on the windows command
-Wait until process done.
-After all done run flash tool again and flash file x10_2.3.3_stock-with-xrecovery.ftf

Finish, turn on your device and white Sony Ericcson text disappear change to Sony Erricsson kernel logo, and that include xrec, so although you flashing fail and etc, xrec file can't disappear, because the kernel has been include

Note: x10_2.3.3_stock-with-xrecovery.ftf is GB kernel standard, just include xrec and logo's
Readmore >>; how to unlock Xperia X10

Tuesday, December 27, 2011

How to flashing android

how to upgrade your android mobile phone

BEWARE
Do With Your Risk
We Note Responsible If your Device Brick Or Broken

Prepare
1. Android Mobile Phone
2. USB Cabel Data
3. PC
4. Odin Multi Downloader here
5. Firmware

CLOSE YOUR INTERNET CONNECTION BEFORE UPGRADE YOUR DEVICE

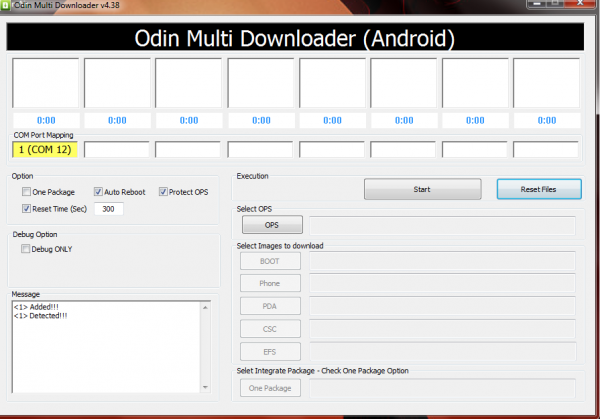
1   Open Odin Downloader

android

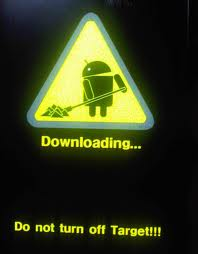
2. Reboot your device to download mode (i use samsung galaxy mini on other device may be different , press volume down button + center button + power button together and hold until download mode coming)

android
3. connected android mobile phone to PC still on download mode, wait until odin detected your device
android
4. extract firmware file to PC
android

5. back to odin page, choice file to flashing and insert the file on odin like a picture 
android
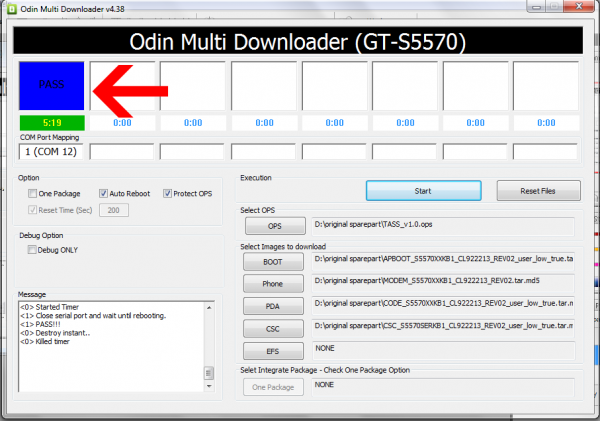
then press start and wait until reboot complete
android
6. DONE your device has been flashing with new room ^^
just set a language to complete instaling flash

Readmore >>; How to flashing android

Saturday, December 24, 2011

How to Hide picture or video without Apps??


how to hide a picture?

the trick to hide any picture and video is:
1. create a new file .nomedia, where the file will be HIDE all media and movie file

how to make a .nomedia file the method is use Ms-Dos
1. On the windows go to run and type cmd then press ENTER
2. Type copy con .nonmedia  then press ENTER
3. CTRL + Z then press ENTER
4. 1 file .nonmedia  created

5. Type  exit
6. Transfer the file .nonmedia to you SDcard and place on folder you wish to HIDE
7. done

**The file .nonmedia can be duplicate with copy paste

Readmore >>; How to Hide picture or video without Apps??

Friday, December 23, 2011

How to convert HD to QVGA / HVGA

Tools

We need the following programs:
1. Apk Manager (download here).
2. Any text editor (notepad will fit).
3. Ida Pro 5.5 (can be found in the internet, the tracker).
4. Any hex editor (I use UltraEdit).
Now let us think that the game is optimized for screen HVGA / QVGA?
It can be divided into several stages.
Key:
1. Changing the rendering resolution to HVGA / QVGA.
2. Adjustment grid touch screen.
Secondary:
3.

How to

disable the cache (necessary in order to be able to convert introductory video at lower resolution).
4. Assigning a hardware button on any action (required for phones without multitouch).

Before proceeding to any stage of optimization, we need to get to the source code, the original source code, we certainly do not get, but we can get a JAVA-byte code, which is quite to our problem would be enough. For this purpose, we use "Apk Manager".

Install and use a "Apk Manager".

The setup is nothing complicated, just unzip it to any folder. Also recommend that a file Script.bat, located in the folder "Apk Manager", change "set heapy = 64" to a higher value, such as 256 or 512, to prevent problems with large agribusiness files.
Working with "Apk Manager" also does not present difficulties. Required APK file put in folder "place-apk-here-for-modding", run "Script.bat" and the pop up window with green text, press "9 " and "Enter". Less than a minute later, the folder "projects" we unpacked APK file. Packs the same, run "Script.bat", click on "11"," Enter ", the question is whether the APC system? "Hit"n". And in the end, when the APK-packed file, sign it, for that press "12 " and "Enter". As a result, we get in the folder "place-apk-here-for-modding" file with the name signed [the name of the original APK-file].apk. Additionally, about "Apk manager" can be read here.
Further in the text I will miss the description of the process of unpacking / packing APK files.
Also, before you start, I recommend to first review a list of commands JAVA-byte code.
Now you can overstep directly to optimization, for example I will use the game "Modern Combat: Sandstorm".

1. Changing the rendering resolution to HVGA / QVGA.

Most games under

android

, written using OpenGL, an OpenGL permission given by the function "glViewPort", and it will use. The most optimal, I think the function "glViewPort" place in the function "OnDrawFrame". To do this, by looking in the folder "smali", which is located in a folder with raspakovanym APK file, look for a file containing the function "OnDrawFrame". Usually this file is named "GameRenderer.smali" or "[Name Game] Renderer.smali ", in this case, "SandstormRenderer.smali". Open it in Notepad or another text editor and find in it the function "OnDrawFrame".
Here is a fragment of this function.

.method public onDrawFrame(Ljavax/microedition/khronos/opengles/GL10;)V
    .locals 6
    .parameter "gl"
    .prologue
    .line 174
    const-wide/16 v0, 0x0
    .line 177
    .local v0, time:J
    invoke-static {}, Ljava/lang/System;->currentTimeMillis()J
    move-result-wide v0
    .line 179
    invoke-static {}, Lcom/gameloft/android/GAND/GloftMCHP/GLMediaPlayer;->update()V
    .line 180
    invoke-static {}, Lcom/gameloft/android/GAND/GloftMCHP/SandstormRenderer;->nativeRender()V
    .line 186
    const-wide/16 v2, 0x32
    invoke-static {}, Ljava/lang/System;->currentTimeMillis()J
    move-result-wide v4
    sub-long/2addr v4, v0
    sub-long v0, v2, v4
    .line 188
    const-wide/16 v2, 0x0
    cmp-long v2, v0, v2
    if-lez v2, :cond_0
    .line 190
    :try_start_0
    invoke-static {v0, v1}, Ljava/lang/Thread;->sleep(J)V
    :try_end_0
    .catch Ljava/lang/Exception; {:try_start_0 .. :try_end_0} :catch_0
    .line 193
    :cond_0
    :goto_0
    return-void
    .line 190
    :catch_0
    move-exception v2
    goto :goto_0
.end method
In this snippet of code to add the function call "glViewPort", so to obtain, as in the code snippet below.

.method public onDrawFrame(Ljavax/microedition/khronos/opengles/GL10;)V
        .locals 9
    .parameter "gl"
    .prologue
    const/16 v8, 0x1E0
    const/16 v7, 0x140
    const/4 v6, 0x0
    invoke-interface {p1, v6, v6, v8, v7}, Ljavax/microedition/khronos/opengles/GL10;->glViewport(IIII)V
    .line 174
    const-wide/16 v0, 0x0
    .line 177
    .local v0, time:J
    invoke-static {}, Ljava/lang/System;->currentTimeMillis()J
    move-result-wide v0
    .line 179
    invoke-static {}, Lcom/gameloft/android/GAND/GloftMCHP/GLMediaPlayer;->update()V
    .line 180
    invoke-static {}, Lcom/gameloft/android/GAND/GloftMCHP/SandstormRenderer;->nativeRender()V
    .line 186
    const-wide/16 v2, 0x32
    invoke-static {}, Ljava/lang/System;->currentTimeMillis()J
    move-result-wide v4
    sub-long/2addr v4, v0
    sub-long v0, v2, v4
    .line 188
    const-wide/16 v2, 0x0
    cmp-long v2, v0, v2
    if-lez v2, :cond_0
    .line 190
    :try_start_0
    invoke-static {v0, v1}, Ljava/lang/Thread;->sleep(J)V
    :try_end_0
    .catch Ljava/lang/Exception; {:try_start_0 .. :try_end_0} :catch_0
    .line 193
    :cond_0
    :goto_0
    return-void
    .line 190
    :catch_0
    move-exception v2
    goto :goto_0
.end method

What we have done here? We've added three constants (v6, v7, v8), assign them a value of coordinates of the left lower (v6; v6) and upper right (v8; v7) corner of the screen and transferred them to the function "glViewport". I think it is understandable why for the coordinates of the lower left corner for the X and Y is used alone and also a constant v6? Since both X and Y in this corner are equal. In addition, change the 2-th line in the function ". locals 6 " on ". locals 9 ", it determines the number of constants / variables used in functions, so we added 3 constants, 6 +3 = 9. Also note that the names of the constants (v6, v7, v8), are not taken casually, as selected by focusing on already used in the function of the constants. If suddenly someone did not understand, 0x1E0 in decimal would be 480 and 0x140 - 320.

Also pay attention to the function "onSurfaceCreated".

.method public onSurfaceCreated(Ljavax/microedition/khronos/opengles/GL10;Ljavax/microedition/khronos/egl/EGLConfig;)V
    .locals 7
    .parameter "gl"
    .parameter "config"
    .prologue
    const/4 v3, -0x1
    .line 138
    const/4 v0, 0x2
    const-string v1, "SandstormRenderer"
    const-string v2, "onSurfaceCreated"
    invoke-static {v0, v1, v2}, Lcom/gameloft/android/GAND/GloftMCHP/GLDebug;->debugMessage(ILjava/lang/String;Ljava/lang/String;)V
    .line 141
    invoke-direct {p0}, Lcom/gameloft/android/GAND/GloftMCHP/SandstormRenderer;->nativeGetJNIEnv()V
    .line 142
    invoke-static {}, Lcom/gameloft/android/GAND/GloftMCHP/GLResLoader;->init()V
    .line 143
    invoke-static {}, Lcom/gameloft/android/GAND/GloftMCHP/GLMediaPlayer;->init()V
    .line 144
    invoke-static {}, Lcom/gameloft/android/GAND/GloftMCHP/Sandstorm;->nativeInit()V
    .line 146
    :goto_0
    sget v0, Lcom/gameloft/android/GAND/GloftMCHP/SandstormGLSurfaceView;->mDevice_W:I
    if-eq v0, v3, :cond_0
    sget v0, Lcom/gameloft/android/GAND/GloftMCHP/SandstormGLSurfaceView;->mDevice_H:I
    if-ne v0, v3, :cond_1
    .line 149
    :cond_0
    const-wide/16 v0, 0x32
    :try_start_0
    invoke-static {v0, v1}, Ljava/lang/Thread;->sleep(J)V
    :try_end_0
    .catch Ljava/lang/Exception; {:try_start_0 .. :try_end_0} :catch_0
    goto :goto_0
    :catch_0
    move-exception v6
    .local v6, ex:Ljava/lang/Exception;
    invoke-virtual {v6}, Ljava/lang/Exception;->printStackTrace()V
    goto :goto_0
    .line 154
    .end local v6           #ex:Ljava/lang/Exception;
    :cond_1
    sget v1, Lcom/gameloft/android/GAND/GloftMCHP/Sandstorm;->m_bEnableKeyboard:I
    const/4 v2, 0x1
    sget v3, Lcom/gameloft/android/GAND/GloftMCHP/SandstormGLSurfaceView;->mDevice_W:I
    sget v4, Lcom/gameloft/android/GAND/GloftMCHP/SandstormGLSurfaceView;->mDevice_H:I
    sget v5, Lcom/gameloft/android/GAND/GloftMCHP/Sandstorm;->mCurrentLang:I
    move-object v0, p0
    invoke-direct/range {v0 .. v5}, Lcom/gameloft/android/GAND/GloftMCHP/SandstormRenderer;->nativeInit(IIIII)V
    .line 155
    return-void
.end method
 Namely, the code

sget v3, Lcom/gameloft/android/GAND/GloftMCHP/SandstormGLSurfaceView;->mDevice_W:I

sget v4, Lcom/gameloft/android/GAND/GloftMCHP/SandstormGLSurfaceView;->mDevice_H:I

In this code, the variable v3, v4 assigned to the real resolution screen devices, and passed to the function "nativeInit". Since the game is still designed for 480x800 resolution, it is better to have the game thinking that you have a device with this particular resolution. in this code is replaced by


const/16 v3, 0x320

const/16 v4, 0x1E0

If you do not experience problems.
(You can ask and 480h720, since the proportion of screens with 480x800 and 320x480 are different and when "squeeze " the picture is slightly flattened (thanks for the comment G @ sh! sh). But in this case, at the stage of "adjustment grid touch screen", the coefficient must be assumed to be between 800 and between 720 and will it be 1.666666666666667 and 720/480 = 1.5)

For some games, our work is enough and they safely change the permissions on all the graphics you need. To do this again packs APK-file and check the phone as he works. If everything is successful then go to the item "adjustment grid the touch screen. " If not, read on. In our case, with the game Modern Combat: Sandstorm, not everything is smooth, game graphics smashtabirovalas until the required permission, and the menu - no. This means that somewhere in the function is called "glViewPort", and then change the resolution to 480x800. Thus, as in the files "*. smali" function "glViewPort" do not call, you can check by searching, so the case in the library "libsandstorm.so".

The main idea of ​​the next step, remove all calls to library functions "glViewPort".
To analyze the library, we need the "Ida Pro". For convenience, copy "libsandstorm.so" in any folder, run "Ida Pro" and click on "New" button

Then choose "Various files", "Unknown file" and click "OK".

In the window, open the file specify the path to the library "libsandstorm.so" and click "Open. "
In the next window, change the "Processor type" to "ARM processorARM710a", then click "Set" and "Ok ".

If after this, there will be another window with anything, click "OK ". Now you need to wait for the disassembly. This process is quite long, in this you can go to smoke or drink coffee
The fact that reverse engineering is completed, will show a message "The initial autoanalysis has been finished." in the lower box "Output window".

For greater convenience, in this case, click the right mouse button on a blue field, and on the shortcut menu, select "Text view". Moving to the beginning of assembler code for the search for "glViewPort".

Hit the keyboard shortcut "Alt + T" in the dialog box to enter search "glViewPort" and click "OK".

We are interested in function calls "BLX glViewport", "BL glViewport", "B glViewport", "BX glViewport", etc. Any other mentions of "glViewport" we deny press "Ctrl + T" and continue the search.
A necessary place, switch to the "Hex View-A".

Make sure that the function call takes 4 bytes and a "CE F7 D4 E8" (in your case, these figures may be different), it is necessary in order to see what needs to be corrected and do not accidentally overwrite anything extra.

Calling this function we need to drink, for it must be replaced by "CE F7 D4 E8" (in your case, these figures may be different) on "C0 46 C0 46. Remember the address "001F994A" and run the hex editor, I use "UltraEdit". Open it to our library.

In order to move us to the right address, click "Ctrl + G", in the input box will appear "0x001F994A" and click "OK".

Moving, we see that hit where you want, all the hexadecimal code converges to the fact that we saw in "Ida Pro" tab "Hex View-A".

Correcting the "CE F7 D4 E8" on "C0 46 C0 46.

Switches to "Ida Pro" and continue to search for the following calls "glViewPort", there may be several dozen. They have been treated similarly.
When all calls to drink, is preserved. Copy to place a revised "libsandstorm.so". Packs APK-file and set the phone to check. If done correctly, the entire schedule to Decrease the required permission.
Readmore >>; How to convert HD to QVGA / HVGA